(Copied from MWA wiki and edited.) Tag: sourceedit |
No edit summary |
||
| (35 intermediate revisions by 10 users not shown) | |||
| Line 1: | Line 1: | ||
| − | [[File: |
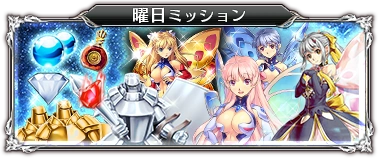
+ | [[File:Menu_Daily_Missions.png|right|300px]] |
| − | + | '''Daily Missions''' (曜日限定ミッション) are sets of missions that allow players to accumulate specific resources en masse. Daily Missions are available for 1 day each, and rotate out on a fixed schedule. There are 5 difficulty tiers for each of the missions - Easy (初級), Normal (中級), Hard (上級), Extreme (極級), and God (神級). |
|
| − | The Daily |
+ | The Daily Missions rotate at 00:00 JST. |
| − | |||
| − | Drop rates for E, N, and H difficulties taken from [http://aigis.dougax.net/%E3%83%89%E3%83%AD%E3%83%83%E3%83%97%E5%8A%B9%E7%8E%87 this site (NSFW warning)]. (Note that the actual drop rate percentages are the numbers displayed +1%, due to how its calculations work). It also has efficiency calculations. Special thanks to Lafate for the source. |
||
| − | |||
| − | Drop rates for X and G difficulties taken from [http://sennenaigis.blog.fc2.com/blog-entry-2990.html this site]. (Note that the numbers are unofficial. Also, it only shows the rough percentages during a 1.5x drop rate increase event, so the ordinary drop rates are assumed to be the numbers displayed on this page divided by 1.5.) |
||
== Monday - Golden Armor == |
== Monday - Golden Armor == |
||
| + | Here, players can collect both [[Gold Armor]]s and [[Platinum Armor]]s, as well as a large amount of Gold. The area is under a poisonous field effect, which deals damage-over-time to all friendly units. The Armors each have a chance to drop themselves, with the Platinum Armor being significantly rarer than Gold Armors. |
||
| − | [[File:Golden_Armor_M.png|thumb|right|180px|Golden Armor N, with all starting parameters]] |
||
| − | |||
| − | Here, players can collect both [[Fodder Units|Gold Armors and Platinum Armors]], as well as a large amount of Gold. The area is under a poisonous field effect, which deals damage-over-time to all friendly units. The Armors each have a chance to drop themselves, with the Platinum Armor being the rarest. |
||
=== Tips === |
=== Tips === |
||
| − | In general, bring plenty of magic damage with you ([[:Category:Witches|Witches]], [[:Category:Mages|Mages]], [[:Category:Princesses|Princesses]]), as the Armors have very high defense values and are the primary objective in this mission. Because of the poison, strong healers are also necessary. |
+ | In general, bring plenty of magic damage with you ([[:Category:Witches|Witches]], [[:Category:Mages|Mages]], [[:Category:Princesses|Princesses]] etc.), as the Armors have very high defense values and are the primary objective in this mission. Because of the poison, strong healers are also necessary. |
| + | <br /><br /> |
||
| + | The most efficient map for Gold is [[Golden Armor X]]. [[Golden Armor N]], while slightly less efficient, is more forgiving in terms of Charisma cost. |
||
| + | <br /> |
||
| + | The most efficient map for Platinum Armors is [[Golden Armor G]]. |
||
{| class="wikitable" style="text-align:center" |
{| class="wikitable" style="text-align:center" |
||
| Line 25: | Line 23: | ||
! Units |
! Units |
||
! rowspan="2" | |
! rowspan="2" | |
||
| − | ! |
+ | ! colspan="4" rowspan="2" |Drops |
| − | Drops |
||
| − | ! rowspan="2" |Avg G/Run<ref name=":0">(Drop rate of each Gold armor) * (discharge reward of Gold Armor) * (number of Gold Armor drops) + (3-star Mission Clear Gold reward)</ref> |
||
| − | ! rowspan="2" |Avg G/Cha<ref>(Avg G/Run) / (Charisma consumed per run)</ref> |
||
| − | ! rowspan="2" |Avg G/Stam<ref name=":1">(Avg G/Run) / (Stamina consumed per run)</ref> |
||
|- |
|- |
||
! Sta |
! Sta |
||
| Line 35: | Line 29: | ||
! Enemies |
! Enemies |
||
|- |
|- |
||
| − | | rowspan="2" |[[Golden Armor E]] |
+ | | rowspan="2" |黄金の鎧 初級<br />[[Golden Armor E]] |
|15 |
|15 |
||
| rowspan="2" |50 |
| rowspan="2" |50 |
||
| − | | rowspan="2" | |
+ | | rowspan="2" |7500 |
|30 |
|30 |
||
|8 |
|8 |
||
| rowspan="2" | |
| rowspan="2" | |
||
| − | | rowspan="2" |Gold Armor |
+ | | rowspan="2" |{{Align icon|Gold Armor|width=40|float=none}} |
| − | | rowspan="2" | |
+ | | rowspan="2" |Gold Armor x4 |
| − | | rowspan="2" | |
+ | | rowspan="2" |{{Align icon|Platinum Armor|width=40|float=none}} |
| − | | rowspan="2" | |
+ | | rowspan="2" |Platinum Armor |
| − | | rowspan="2" |4815 |
||
|- |
|- |
||
|2 |
|2 |
||
| Line 52: | Line 45: | ||
|23 |
|23 |
||
|- style="background:linear-gradient(to right, rgb(245,177,18), rgb(255,255,255));" |
|- style="background:linear-gradient(to right, rgb(245,177,18), rgb(255,255,255));" |
||
| − | | colspan=" |
+ | | colspan="15" | |
|- |
|- |
||
| − | | rowspan="2" |[[Golden Armor N]] |
+ | | rowspan="2" |黄金の鎧 中級<br />[[Golden Armor N]] |
|24 |
|24 |
||
| rowspan="2" |70 |
| rowspan="2" |70 |
||
| − | | rowspan="2" | |
+ | | rowspan="2" |9000 |
|30 |
|30 |
||
|8 |
|8 |
||
| rowspan="2" | |
| rowspan="2" | |
||
| − | | rowspan="2" |Gold Armor |
+ | | rowspan="2" |{{Align icon|Gold Armor|width=40|float=none}} |
| − | | rowspan="2" | |
+ | | rowspan="2" |Gold Armor x5 |
| − | | rowspan="2" | |
+ | | rowspan="2" |{{Align icon|Platinum Armor|width=40|float=none}} |
| − | | rowspan="2" | |
+ | | rowspan="2" |Platinum Armor |
| − | | rowspan="2" |6420 |
||
|- |
|- |
||
|2 |
|2 |
||
| Line 71: | Line 63: | ||
|27 |
|27 |
||
|- style="background:linear-gradient(to left, rgb(245,177,18),rgb(255,255,255));" |
|- style="background:linear-gradient(to left, rgb(245,177,18),rgb(255,255,255));" |
||
| − | | colspan=" |
+ | | colspan="15" | |
|- |
|- |
||
| − | | rowspan="2" |[[Golden Armor H]] |
+ | | rowspan="2" |黄金の鎧 上級<br />[[Golden Armor H]] |
|60 |
|60 |
||
| rowspan="2" |100 |
| rowspan="2" |100 |
||
| − | | rowspan="2" | |
+ | | rowspan="2" |10500 |
|35 |
|35 |
||
|8 |
|8 |
||
| rowspan="2" | |
| rowspan="2" | |
||
| − | | rowspan="2" |Gold Armor |
+ | | rowspan="2" |{{Align icon|Gold Armor|width=40|float=none}} |
| − | | rowspan="2" | |
+ | | rowspan="2" |Gold Armor x6 |
| − | | rowspan="2" | |
+ | | rowspan="2" |{{Align icon|Platinum Armor|width=40|float=none}} |
| − | | rowspan="2" | |
+ | | rowspan="2" |Platinum Armor |
| − | | rowspan="2" |8620 |
||
|- |
|- |
||
|3 |
|3 |
||
| Line 90: | Line 81: | ||
|30 |
|30 |
||
|- style="background:linear-gradient(to right, rgb(245,177,18),rgb(255,255,255));" |
|- style="background:linear-gradient(to right, rgb(245,177,18),rgb(255,255,255));" |
||
| − | | colspan=" |
+ | | colspan="15" | |
|- |
|- |
||
| − | | rowspan="2" |[[Golden Armor X]] |
+ | | rowspan="2" |黄金の鎧 極級<br />[[Golden Armor X]] |
|80 |
|80 |
||
| rowspan="2" |120 |
| rowspan="2" |120 |
||
| Line 99: | Line 90: | ||
|8 |
|8 |
||
| rowspan="2" | |
| rowspan="2" | |
||
| − | | rowspan="2" |Gold Armor |
+ | | rowspan="2" |{{Align icon|Gold Armor|width=40|float=none}} |
| − | | rowspan="2" | |
+ | | rowspan="2" |Gold Armor x6 |
| − | | rowspan="2" | |
+ | | rowspan="2" |{{Align icon|Platinum Armor|width=40|float=none}} |
| − | | rowspan="2" | |
+ | | rowspan="2" |Platinum Armor |
| − | | rowspan="2" |12320 |
||
|- |
|- |
||
|3 |
|3 |
||
| Line 109: | Line 99: | ||
|30 |
|30 |
||
|- style="background:linear-gradient(to left, rgb(245,177,18),rgb(255,255,255));" |
|- style="background:linear-gradient(to left, rgb(245,177,18),rgb(255,255,255));" |
||
| − | | colspan=" |
+ | | colspan="15" | |
|- |
|- |
||
| − | | rowspan="2" |[[Golden Armor G]] |
+ | | rowspan="2" |黄金の鎧 神級<br />[[Golden Armor G]] |
|80 |
|80 |
||
| rowspan="2" |160 |
| rowspan="2" |160 |
||
| − | | rowspan="2" | |
+ | | rowspan="2" |31500 |
|40 |
|40 |
||
|9 |
|9 |
||
| rowspan="2" | |
| rowspan="2" | |
||
| − | | rowspan="2" |Gold Armor |
+ | | rowspan="2" |{{Align icon|Gold Armor|width=40|float=none}} |
| − | | rowspan="2" | |
+ | | rowspan="2" |Gold Armor x4 |
| − | | rowspan="2" | |
+ | | rowspan="2" |{{Align icon|Platinum Armor|width=40|float=none}} |
| − | | rowspan="2" | |
+ | | rowspan="2" |Platinum Armor x3 |
| − | | rowspan="2" |6800 |
||
|- |
|- |
||
|6 |
|6 |
||
| Line 128: | Line 117: | ||
|30 |
|30 |
||
|} |
|} |
||
| − | |||
| − | If your team can clear Golden Armor X or G, you also have to consider average gold per charisma. As 20 charisma and 1 stamina will be restored per hour, if you go for Golden Armor X, charisma will take more time than stamina to be restored. So when we compare H and X, X will be better because it gives more average gold per charisma(the point here is that you should compare Avg G/Cha, not Avg G/stam). And if it comes to X and G, X will be better for collecting gold, and G will be better for collecting Plat Armor.<small><references /></small> |
||
== Tuesday - Spirit Rescue == |
== Tuesday - Spirit Rescue == |
||
Here, players can collect [[Fodder Units|Spirits]] of all rarities from Silver to Rainbow. The mission consists of large waves of fast enemies, which is best dealt with using strong, cheap blockers. Although AoE is desirable, it is much too expensive to deploy here, so archers are much more useful. As with the majority of dailies, this map also has the poison effect which deals your units damage over time, so a Healer is advised. |
Here, players can collect [[Fodder Units|Spirits]] of all rarities from Silver to Rainbow. The mission consists of large waves of fast enemies, which is best dealt with using strong, cheap blockers. Although AoE is desirable, it is much too expensive to deploy here, so archers are much more useful. As with the majority of dailies, this map also has the poison effect which deals your units damage over time, so a Healer is advised. |
||
| − | It should be noted that all Spirits drop from specifically colored wolves only |
+ | It should be noted that all Spirits drop from specifically colored wolves only. |
=== Tips === |
=== Tips === |
||
| Line 142: | Line 129: | ||
Nasu: [https://www.youtube.com/watch?v=hCV2aznvjns E] [https://www.youtube.com/watch?v=d9_9bLtgAiQ N] [https://www.youtube.com/watch?v=qe0qdGiLkc4 H] [https://www.youtube.com/watch?v=8xxVUzbJBAk X] [https://www.youtube.com/watch?v=MGye17VnHfU G] |
Nasu: [https://www.youtube.com/watch?v=hCV2aznvjns E] [https://www.youtube.com/watch?v=d9_9bLtgAiQ N] [https://www.youtube.com/watch?v=qe0qdGiLkc4 H] [https://www.youtube.com/watch?v=8xxVUzbJBAk X] [https://www.youtube.com/watch?v=MGye17VnHfU G] |
||
| − | |||
| − | {{Hidebox|header = Alternative Strategy|body = It can be done without any bronze soldier and in fact it is easier that way. You will need CC Gold Soldier, two CC archers. Important: one of the archers _must_ be Silver and must be CR, one Silver CR/nonCC Rogue, CC Healer, two Silver CR/nonCC Soldiers. You can use Phillys but don't need to since by the time she activates her skill you will be placing your last unit. So start the game. Place your Gold Soldier on the rightmost cross road, then Silver Archer adjacent to the low lane on the second firing position starting from the right. Then Silver Rogue just in front of Gold Soldier. Between the three of them they will take care of the initial rush. Then place a Silver Soldier in the second crossroads starting from the right, then the Price in the uppermost crossroads and after him place the second Silver Soldier between Prince and first Silver. Activate Gold Soldier's skill and place Healer and, finally, second Archer. Collect Sacred Crystal. Very important: Don't use higher rarity or CC units when explicitly told they must be Silver or nonCC. This solution allows you to dispense with Bronze Soldiers taking slots in your barracks and to put to better use the Gold needed for maxing them.}} |
||
{| class="wikitable" style="text-align:center" |
{| class="wikitable" style="text-align:center" |
||
| Line 154: | Line 139: | ||
! Units |
! Units |
||
! rowspan="2" | |
! rowspan="2" | |
||
| − | ! colspan=" |
+ | ! colspan="6" rowspan="2" |Drops |
| − | Drops |
||
|- |
|- |
||
! Sta |
! Sta |
||
| Line 161: | Line 145: | ||
! Enemies |
! Enemies |
||
|- |
|- |
||
| − | | rowspan="2" |[[Spirit Rescue E]] |
+ | | rowspan="2" |聖霊救出 初級<br />[[Spirit Rescue E]] |
|15 |
|15 |
||
| rowspan="2" |80 |
| rowspan="2" |80 |
||
| Line 168: | Line 152: | ||
|8 |
|8 |
||
| rowspan="2" | |
| rowspan="2" | |
||
| + | |{{Align icon|Cyrille|width=40|float=none}} |
||
| − | |Spirit of Silver (51%) |
||
| − | |Spirit of |
+ | |Spirit of Silver x2 |
| + | |{{Align icon|Nina|width=40|float=none}} |
||
| − | |Spirit of Rainbow (2%) |
||
| + | |Spirit of Gold |
||
| + | |{{Align icon|Celia|width=40|float=none}} |
||
| + | |Spirit of Platinum |
||
|- |
|- |
||
|2 |
|2 |
||
|5 |
|5 |
||
|27 |
|27 |
||
| + | |{{Align icon|Florika|width=40|float=none}} |
||
| − | |Spirit of Platinum (11%) |
||
| − | |Spirit of Black |
+ | |Spirit of Black |
| + | |{{Align icon|Christia|width=40|float=none}} |
||
| − | |<nowiki>-</nowiki> |
||
| + | |Spirit of Rainbow |
||
| + | | colspan="2" | - |
||
|- style="background:linear-gradient(to right, rgb(158,62,173), rgb(255,255,255));" |
|- style="background:linear-gradient(to right, rgb(158,62,173), rgb(255,255,255));" |
||
| − | | colspan=" |
+ | | colspan="14" | |
|- |
|- |
||
| − | | rowspan="2" |[[Spirit Rescue N]] |
+ | | rowspan="2" |聖霊救出 中級<br />[[Spirit Rescue N]] |
|30 |
|30 |
||
| rowspan="2" |90 |
| rowspan="2" |90 |
||
| Line 188: | Line 177: | ||
|8 |
|8 |
||
| rowspan="2" | |
| rowspan="2" | |
||
| + | |{{Align icon|Cyrille|width=40|float=none}} |
||
| − | |Spirit of Silver (71%) |
||
| − | |Spirit of |
+ | |Spirit of Silver |
| + | |{{Align icon|Nina|width=40|float=none}} |
||
| − | |Spirit of Rainbow (3%) |
||
| + | |Spirit of Gold x2 |
||
| + | |{{Align icon|Celia|width=40|float=none}} |
||
| + | |Spirit of Platinum |
||
|- |
|- |
||
|3 |
|3 |
||
|5 |
|5 |
||
|40 |
|40 |
||
| + | |{{Align icon|Florika|width=40|float=none}} |
||
| − | |Spirit of Platinum (21%) |
||
| − | |Spirit of Black |
+ | |Spirit of Black |
| + | |{{Align icon|Christia|width=40|float=none}} |
||
| − | |<nowiki>-</nowiki> |
||
| + | |Spirit of Rainbow |
||
| + | | colspan="2" | - |
||
|- style="background:linear-gradient(to left, rgb(158,62,173),rgb(255,255,255));" |
|- style="background:linear-gradient(to left, rgb(158,62,173),rgb(255,255,255));" |
||
| − | | colspan=" |
+ | | colspan="14" | |
|- |
|- |
||
| − | | rowspan="2" |[[Spirit Rescue H]] |
+ | | rowspan="2" |聖霊救出 上級<br />[[Spirit Rescue H]] |
|60 |
|60 |
||
| rowspan="2" |120 |
| rowspan="2" |120 |
||
| Line 208: | Line 202: | ||
|8 |
|8 |
||
| rowspan="2" | |
| rowspan="2" | |
||
| + | |{{Align icon|Nina|width=40|float=none}} |
||
| − | |Spirit of Gold (100%) |
||
| − | |Spirit of |
+ | |Spirit of Gold |
| + | |{{Align icon|Celia|width=40|float=none}} |
||
| − | | rowspan="2" | - |
||
| + | |Spirit of Platinum x2 |
||
| + | |{{Align icon|Florika|width=40|float=none}} |
||
| + | | Spirit of Black x2 |
||
|- |
|- |
||
|6 |
|6 |
||
|5 |
|5 |
||
|57 |
|57 |
||
| + | |{{Align icon|Christia|width=40|float=none}} |
||
| − | |Spirit of Black (13%) x2 |
||
| − | |Spirit of Rainbow |
+ | |Spirit of Rainbow x2 |
| + | | colspan="2" | - |
||
| + | | colspan="2" | - |
||
|- style="background:linear-gradient(to right, rgb(158,62,173),rgb(255,255,255));" |
|- style="background:linear-gradient(to right, rgb(158,62,173),rgb(255,255,255));" |
||
| − | | colspan=" |
+ | | colspan="14" | |
|- |
|- |
||
| − | | rowspan="2" |[[Spirit Rescue X]] |
+ | | rowspan="2" |聖霊救出 極級<br />[[Spirit Rescue X]] |
|80 |
|80 |
||
| rowspan="2" |180 |
| rowspan="2" |180 |
||
| Line 227: | Line 226: | ||
|8 |
|8 |
||
| rowspan="2" | |
| rowspan="2" | |
||
| − | | rowspan="2" | |
+ | | rowspan="2" |{{Align icon|Celia|width=40|float=none}} |
| − | | rowspan="2" |Spirit of |
+ | | rowspan="2" |Spirit of Platinum |
| − | | rowspan="2" | |
+ | | rowspan="2" |{{Align icon|Florika|width=40|float=none}} |
| + | | rowspan="2" |Spirit of Black x3 |
||
| + | | rowspan="2" |{{Align icon|Christia|width=40|float=none}} |
||
| + | | rowspan="2" |Spirit of Rainbow x2 |
||
|- |
|- |
||
|6 |
|6 |
||
| Line 235: | Line 237: | ||
|39 |
|39 |
||
|- style="background:linear-gradient(to left, rgb(158,62,173),rgb(255,255,255));" |
|- style="background:linear-gradient(to left, rgb(158,62,173),rgb(255,255,255));" |
||
| − | | colspan=" |
+ | | colspan="14" | |
|- |
|- |
||
| − | | rowspan="2" |[[Spirit Rescue G]] |
+ | | rowspan="2" |聖霊救出 神級<br />[[Spirit Rescue G]] |
|80 |
|80 |
||
| rowspan="2" |200 |
| rowspan="2" |200 |
||
| Line 244: | Line 246: | ||
|10 |
|10 |
||
| rowspan="2" | |
| rowspan="2" | |
||
| + | |{{Align icon|Celia|width=40|float=none}} |
||
| − | | rowspan="2" |Spirit of Platinum (41%) x2 |
||
| − | + | |Spirit of Platinum x2 |
|
| + | |{{Align icon|Florika|width=40|float=none}} |
||
| − | | rowspan="2" |Spirit of Rainbow (5%) x2 |
||
| + | |Spirit of Black x2 |
||
| + | |{{Align icon|Christia|width=40|float=none}} |
||
| + | |Spirit of Rainbow x2 |
||
|- |
|- |
||
|8 |
|8 |
||
|10 |
|10 |
||
|33 |
|33 |
||
| + | |{{Align icon|Gladys|width=40|float=none}} |
||
| + | |Spirit Queen |
||
| + | | colspan="2" | - |
||
| + | | colspan="2" | - |
||
|} |
|} |
||
| Line 273: | Line 282: | ||
! Units |
! Units |
||
! rowspan="2" | |
! rowspan="2" | |
||
| − | ! |
+ | ! rowspan="2" | |
| + | ! colspan="6" rowspan="2" | Drops |
||
| − | Drops |
||
| − | ! rowspan="2" |Avg Crystals/Run<ref>(Number of Demon Crystals in one drop) * (droprate of DC bundle) * (Number of DC drops in one run)</ref> |
||
| − | ! rowspan="2" |Avg Crystals/Stam<ref>(Previous column's result) / (Stamina consumed per run)</ref> |
||
|- |
|- |
||
! Sta |
! Sta |
||
| Line 282: | Line 289: | ||
! Enemies |
! Enemies |
||
|- |
|- |
||
| − | | rowspan="2" |[[ |
+ | | rowspan="2" |新魔水晶の守護者 初級<br />[[Guardian of the Magic Crystal E]] |
|15 |
|15 |
||
| rowspan="2" |90 |
| rowspan="2" |90 |
||
| Line 289: | Line 296: | ||
|8 |
|8 |
||
| rowspan="2" | |
| rowspan="2" | |
||
| − | | |
+ | | rowspan="2" |{{Align icon|Demon Crystal|width=40|float=none}} |
| − | | rowspan="2" | |
+ | | colspan="2" rowspan="2" |Demon Crystal x4 |
| − | | rowspan="2" | |
+ | | rowspan="2" |{{Align icon|Demon Crystal (x2)|width=40|float=none}} |
| + | | rowspan="2" |Demon Crystals (2) x2 |
||
| + | | colspan="2" rowspan="2" |- |
||
|- |
|- |
||
|4 |
|4 |
||
| Line 297: | Line 306: | ||
|13 |
|13 |
||
|- style="background:linear-gradient(to right, rgb(217,28,0), rgb(255,255,255));" |
|- style="background:linear-gradient(to right, rgb(217,28,0), rgb(255,255,255));" |
||
| − | | colspan=" |
+ | | colspan="17" | |
|- |
|- |
||
| − | | rowspan="2" |[[ |
+ | | rowspan="2" |新魔水晶の守護者 中級<br />[[Guardian of the Magic Crystal N]] |
|30 |
|30 |
||
| rowspan="2" |130 |
| rowspan="2" |130 |
||
| Line 306: | Line 315: | ||
|8 |
|8 |
||
| rowspan="2" | |
| rowspan="2" | |
||
| − | | |
+ | | rowspan="2" |{{Align icon|Demon Crystal (x2)|width=40|float=none}} |
| − | | rowspan="2" | |
+ | | colspan="2" rowspan="2" |Demon Crystals (2) x4 |
| − | | rowspan="2" | |
+ | | rowspan="2" |{{Align icon|Demon Crystal (x3)|width=40|float=none}} |
| + | | rowspan="2" |Demon Crystals (3) x2 |
||
| + | | colspan="2" rowspan="2" |- |
||
|- |
|- |
||
|6 |
|6 |
||
| Line 314: | Line 325: | ||
|20 |
|20 |
||
|- style="background:linear-gradient(to left, rgb(217,28,0),rgb(255,255,255));" |
|- style="background:linear-gradient(to left, rgb(217,28,0),rgb(255,255,255));" |
||
| − | | colspan=" |
+ | | colspan="17" | |
|- |
|- |
||
| − | | rowspan="2" |[[ |
+ | | rowspan="2" |新魔水晶の守護者 上級<br />[[Guardian of the Magic Crystal H]] |
|45 |
|45 |
||
| rowspan="2" |200 |
| rowspan="2" |200 |
||
| Line 323: | Line 334: | ||
|8 |
|8 |
||
| rowspan="2" | |
| rowspan="2" | |
||
| − | | |
+ | | rowspan="2" |{{Align icon|Demon Crystal (x2)|width=40|float=none}} |
| − | | rowspan="2" | |
+ | | colspan="2" rowspan="2" |Demon Crystals (2) x2 |
| − | | rowspan="2" | |
+ | | rowspan="2" |{{Align icon|Demon Crystal (x3)|width=40|float=none}} |
| + | | rowspan="2" |Demon Crystals (3) x2 |
||
| + | | rowspan="2" |{{Align icon|Demon Crystal (x5)|width=40|float=none}} |
||
| + | | rowspan="2" |Demon Crystals (5) x2 |
||
|- |
|- |
||
|8 |
|8 |
||
| Line 331: | Line 345: | ||
|39 |
|39 |
||
|- style="background:linear-gradient(to right, rgb(217,28,0),rgb(255,255,255));" |
|- style="background:linear-gradient(to right, rgb(217,28,0),rgb(255,255,255));" |
||
| − | | colspan=" |
+ | | colspan="17" | |
|- |
|- |
||
| − | | rowspan="2" |[[ |
+ | | rowspan="2" |新魔水晶の守護者 極級<br />[[Guardian of the Magic Crystal X]] |
|60 |
|60 |
||
| rowspan="2" |220 |
| rowspan="2" |220 |
||
| Line 340: | Line 354: | ||
|8 |
|8 |
||
| rowspan="2" | |
| rowspan="2" | |
||
| − | | |
+ | | rowspan="2" |{{Align icon|Demon Crystal (x2)|width=40|float=none}} |
| − | | rowspan="2" | |
+ | | colspan="2" rowspan="2" |Demon Crystals (2) x2 |
| − | | rowspan="2" | |
+ | | rowspan="2" |{{Align icon|Demon Crystal (x3)|width=40|float=none}} |
| + | | rowspan="2" |Demon Crystals (3) x3 |
||
| + | | rowspan="2" |{{Align icon|Demon Crystal (x5)|width=40|float=none}} |
||
| + | | rowspan="2" |Demon Crystals (5) x2 |
||
|- |
|- |
||
|8 |
|8 |
||
| Line 348: | Line 365: | ||
|66 |
|66 |
||
|- style="background:linear-gradient(to left, rgb(217,28,0),rgb(255,255,255));" |
|- style="background:linear-gradient(to left, rgb(217,28,0),rgb(255,255,255));" |
||
| − | | colspan=" |
+ | | colspan="17" | |
|- |
|- |
||
| − | | rowspan="2" |[[ |
+ | | rowspan="2" |新魔水晶の守護者 神級<br />[[Guardian of the Magic Crystal G]] |
|70 |
|70 |
||
| rowspan="2" |240 |
| rowspan="2" |240 |
||
| Line 357: | Line 374: | ||
|8 |
|8 |
||
| rowspan="2" | |
| rowspan="2" | |
||
| − | | |
+ | | rowspan="2" |{{Align icon|Demon Crystal (x3)|width=40|float=none}} |
| − | | rowspan="2" | |
+ | | colspan="2" rowspan="2" |Demon Crystals (3) x4 |
| − | | rowspan="2" | |
+ | | rowspan="2" |{{Align icon|Demon Crystal (x5)|width=40|float=none}} |
| + | | rowspan="2" |Demon Crystals (5) x3 |
||
| + | | colspan="2" rowspan="2" |- |
||
|- |
|- |
||
|8 |
|8 |
||
| Line 365: | Line 384: | ||
|70 |
|70 |
||
|} |
|} |
||
| + | |||
| − | <small><references /></small> |
||
| + | <references /> |
||
== Thursday - A Toast to Men/Skyfallen Gift == |
== Thursday - A Toast to Men/Skyfallen Gift == |
||
| Line 375: | Line 395: | ||
=== Tips === |
=== Tips === |
||
| + | === A Toast to Men === |
||
| − | '''A Toast to Men'''<br />Having [[Christopher]] or [[Robert]] in your team can make things easier - because the majority of available male units are melee, a healer is very valuable in these missions. Even without Christopher, players can 3-star A Toast to Men H if they bring at least two max-level fully-cost-reduced bronze archers ([[Ars]] and/or [[Wilfred]]) to help thin the map of the enemy soldiers and bandits. |
||
| + | Having [[Christopher]] or [[Robert]] in your team can make things easier - because the majority of available male units are melee, a healer is very valuable in these missions. Even without Christopher, players can 3-star A Toast to Men H if they bring at least two max-level fully-cost-reduced bronze archers ([[Ars]] and/or [[Wilfred]]) to help thin the map of the enemy soldiers and bandits. |
||
Nasu: [https://www.youtube.com/watch?v=GgIdxd9YEk8 N] [https://www.youtube.com/watch?v=IU_Pq5LtEZA H] [https://www.youtube.com/watch?v=OntRvTGXZt8 X] |
Nasu: [https://www.youtube.com/watch?v=GgIdxd9YEk8 N] [https://www.youtube.com/watch?v=IU_Pq5LtEZA H] [https://www.youtube.com/watch?v=OntRvTGXZt8 X] |
||
| + | === Skyfallen Gift === |
||
| − | |||
| − | + | There will be multiple waves of gargoyles and red gargoyles, so it's best to have both magic and physical attackers. Since nearly all units come from the same place, a mage placed right at the entrance or at the fork works really well. In N and H dragons will join the fray, so bringing a strong healer is recommended. |
|
Nasu: [https://www.youtube.com/watch?v=zHFEI9H4K4w H] [https://www.youtube.com/watch?v=V5AbsV5kgPM X] [https://www.youtube.com/watch?v=LoI6f77CPZY G] |
Nasu: [https://www.youtube.com/watch?v=zHFEI9H4K4w H] [https://www.youtube.com/watch?v=V5AbsV5kgPM X] [https://www.youtube.com/watch?v=LoI6f77CPZY G] |
||
| − | |||
{| class="wikitable" style="text-align:center" |
{| class="wikitable" style="text-align:center" |
||
| Line 394: | Line 414: | ||
! Units |
! Units |
||
! rowspan="2" | |
! rowspan="2" | |
||
| − | ! colspan=" |
+ | ! colspan="4" rowspan="2" |Drops |
| − | Drops |
||
| − | ! rowspan="2" |Avg Aff/Stam <ref name=":2">{ (Droprate of trust item<sub>x</sub>) * (average trust given by trust item<sub>x</sub>) * (number of trust item<sub>x</sub> dropped) for all four trust items added together } / (Stamina consumed per run). <br> "Average Trustgiven", as defined in the [[Gifts]] page, is 1.3 for Beer, 2.5 for Table Wine, 3.5 for Choice Sake, and 4.5 for Millennium Wine; and, similarly, 1.3 for Bouquet, 2.5 for Crystal, 3.5 for Ruby, and 4.5 for Diamond.</ref> |
||
|- |
|- |
||
! Sta |
! Sta |
||
| Line 402: | Line 420: | ||
! Enemies |
! Enemies |
||
|- |
|- |
||
| − | | rowspan="2" |[[A Toast to Men E]] |
+ | | rowspan="2" |男だけの祝杯 初級<br />[[A Toast to Men E]] |
|15 |
|15 |
||
| rowspan="2" |80 |
| rowspan="2" |80 |
||
| Line 409: | Line 427: | ||
|8 |
|8 |
||
| rowspan="2" | |
| rowspan="2" | |
||
| + | |{{Align icon|Beer|width=40|float=none}} |
||
| − | |Beer (81%) |
||
| + | |Beer x3 |
||
| − | |Table Wine (51%) |
||
| + | |{{Align icon|Table Wine|width=40|float=none}} |
||
| − | | rowspan="2" |1.3365 |
||
| + | |Table Wine |
||
|- |
|- |
||
|2 |
|2 |
||
|5 |
|5 |
||
|20 |
|20 |
||
| − | |Choice Sake |
+ | |{{Align icon|Choice Sake|width=40|float=none}} |
| + | |Choice Sake |
||
| − | |Millenium Wine (3%) |
||
| + | |{{Align icon|Millennium Wine|width=40|float=none}} |
||
| + | |Millenium Wine |
||
|- style="background:linear-gradient(to right, rgb(185,92,1), rgb(255,255,255));" |
|- style="background:linear-gradient(to right, rgb(185,92,1), rgb(255,255,255));" |
||
| − | | colspan=" |
+ | | colspan="13" | |
|- |
|- |
||
| − | | rowspan="2" |[[A Toast to Men N]] |
+ | | rowspan="2" |男だけの祝杯 中級<br />[[A Toast to Men N]] |
|40 |
|40 |
||
| rowspan="2" |90 |
| rowspan="2" |90 |
||
| Line 428: | Line 449: | ||
|8 |
|8 |
||
| rowspan="2" | |
| rowspan="2" | |
||
| + | |{{Align icon|Beer|width=40|float=none}} |
||
| − | |Beer (81%) |
||
| + | |Beer x3 |
||
| − | |Table Wine (61%) |
||
| + | |{{Align icon|Table Wine|width=40|float=none}} |
||
| − | | rowspan="2" |1.904 |
||
| + | |Table Wine |
||
|- |
|- |
||
|2 |
|2 |
||
|5 |
|5 |
||
|36 |
|36 |
||
| − | |Choice Sake |
+ | |{{Align icon|Choice Sake|width=40|float=none}} |
| + | |Choice Sake |
||
| − | |Millenium Wine (11%) |
||
| + | |{{Align icon|Millennium Wine|width=40|float=none}} |
||
| + | |Millenium Wine |
||
|- style="background:linear-gradient(to left, rgb(185,92,1),rgb(255,255,255));" |
|- style="background:linear-gradient(to left, rgb(185,92,1),rgb(255,255,255));" |
||
| − | | colspan=" |
+ | | colspan="13" | |
|- |
|- |
||
| − | | rowspan="2" |[[A Toast to Men H]] |
+ | | rowspan="2" |男だけの祝杯 上級<br />[[A Toast to Men H]] |
|60 |
|60 |
||
| rowspan="2" |100 |
| rowspan="2" |100 |
||
| Line 447: | Line 471: | ||
|8 |
|8 |
||
| rowspan="2" | |
| rowspan="2" | |
||
| + | |{{Align icon|Beer|width=40|float=none}} |
||
| − | |Beer (100%) x3 |
||
| + | |Beer x2 |
||
| − | |Table Wine (61%) x2 |
||
| + | |{{Align icon|Table Wine|width=40|float=none}} |
||
| − | | rowspan="2" |2.993 |
||
| + | |Table Wine x2 |
||
|- |
|- |
||
|3 |
|3 |
||
|5 |
|5 |
||
|27 |
|27 |
||
| − | |Choice Sake |
+ | |{{Align icon|Choice Sake|width=40|float=none}} |
| + | |Choice Sake x2 |
||
| − | |Millenium Wine (21%) |
||
| + | |{{Align icon|Millennium Wine|width=40|float=none}} |
||
| + | |Millenium Wine |
||
|- style="background:linear-gradient(to right, rgb(185,92,1),rgb(255,255,255));" |
|- style="background:linear-gradient(to right, rgb(185,92,1),rgb(255,255,255));" |
||
| − | | colspan=" |
+ | | colspan="13" | |
|- |
|- |
||
| − | | rowspan="2" |[[A Toast to Men X]] |
+ | | rowspan="2" |男だけの祝杯 極級<br />[[A Toast to Men X]] |
|80 |
|80 |
||
| rowspan="2" |120 |
| rowspan="2" |120 |
||
| Line 466: | Line 493: | ||
|8 |
|8 |
||
| rowspan="2" | |
| rowspan="2" | |
||
| − | |Table Wine |
+ | |{{Align icon|Table Wine|width=40|float=none}} |
| + | |Table Wine x3 |
||
| − | |Choice Sake (41%) x2 |
||
| + | |{{Align icon|Choice Sake|width=40|float=none}} |
||
| − | | rowspan="2" |3.788 |
||
| + | |Choice Sake x3 |
||
|- |
|- |
||
|3 |
|3 |
||
|5 |
|5 |
||
|28 |
|28 |
||
| + | |{{Align icon|Millennium Wine|width=40|float=none}} |
||
| − | |Millenium Wine (31%) |
||
| + | |Millenium Wine |
||
| − | | - |
||
| + | | colspan="2" | - |
||
|- style="background:linear-gradient(to left, rgb(185,92,1),rgb(255,255,255));" |
|- style="background:linear-gradient(to left, rgb(185,92,1),rgb(255,255,255));" |
||
| − | | colspan=" |
+ | | colspan="13" | |
|- |
|- |
||
| − | | rowspan="2" |[[A Toast to Men G]] |
+ | | rowspan="2" |男だけの祝杯 神級<br />[[A Toast to Men G]] |
|80 |
|80 |
||
| rowspan="2" |140 |
| rowspan="2" |140 |
||
| Line 485: | Line 514: | ||
|8 |
|8 |
||
| rowspan="2" | |
| rowspan="2" | |
||
| − | | rowspan="2" |Choice Sake |
+ | | rowspan="2" |{{Align icon|Choice Sake|width=40|float=none}} |
| − | | rowspan="2" | |
+ | | rowspan="2" |Choice Sake x3 |
| − | | rowspan="2" | |
+ | | rowspan="2" |{{Align icon|Millennium Wine|width=40|float=none}} |
| + | | rowspan="2" |Millenium Wine x4 |
||
|- |
|- |
||
|4 |
|4 |
||
| Line 493: | Line 523: | ||
|31 |
|31 |
||
|- style="background:linear-gradient(to right, rgb(185,92,1),rgb(0,200,247));" |
|- style="background:linear-gradient(to right, rgb(185,92,1),rgb(0,200,247));" |
||
| − | | colspan=" |
+ | | colspan="13" | |
|- |
|- |
||
| − | | rowspan="2" |[[Skyfallen Gift E]] |
+ | | rowspan="2" |空からの贈物 初級<br />[[Skyfallen Gift E]] |
|15 |
|15 |
||
| rowspan="2" |80 |
| rowspan="2" |80 |
||
| Line 502: | Line 532: | ||
|8 |
|8 |
||
| rowspan="2" | |
| rowspan="2" | |
||
| + | |{{Align icon|Bouquet|width=40|float=none}} |
||
| − | |Bouquet (81%) x2 |
||
| + | |Bouquet x3 |
||
| − | |Crystal (51%) |
||
| + | |{{Align icon|Crystal|width=40|float=none}} |
||
| − | | rowspan="2" |1.863 |
||
| + | |Crystal |
||
|- |
|- |
||
|2 |
|2 |
||
|5 |
|5 |
||
|18 |
|18 |
||
| + | |{{Align icon|Ruby|width=40|float=none}} |
||
| − | |Ruby (6%) |
||
| + | |Ruby |
||
| − | |Diamond (3%) |
||
| + | |{{Align icon|Diamond|width=40|float=none}} |
||
| + | |Diamond |
||
|- style="background:linear-gradient(to left, rgb(0,200,247),rgb(255,255,255));" |
|- style="background:linear-gradient(to left, rgb(0,200,247),rgb(255,255,255));" |
||
| − | | colspan=" |
+ | | colspan="13" | |
|- |
|- |
||
| − | | rowspan="2" |[[Skyfallen Gift N]] |
+ | | rowspan="2" |空からの贈物 中級<br />[[Skyfallen Gift N]] |
|40 |
|40 |
||
| rowspan="2" |90 |
| rowspan="2" |90 |
||
| Line 521: | Line 554: | ||
|8 |
|8 |
||
| rowspan="2" | |
| rowspan="2" | |
||
| + | |{{Align icon|Bouquet|width=40|float=none}} |
||
| − | |Bouquet (81%) x2 |
||
| + | |Bouquet x3 |
||
| − | |Crystal (61%) |
||
| + | |{{Align icon|Crystal|width=40|float=none}} |
||
| − | | rowspan="2" |2.4305 |
||
| + | |Crystal |
||
|- |
|- |
||
|2 |
|2 |
||
|5 |
|5 |
||
|37 |
|37 |
||
| + | |{{Align icon|Ruby|width=40|float=none}} |
||
| − | |Ruby (21%) |
||
| + | |Ruby |
||
| − | |Diamond (11%) |
||
| + | |{{Align icon|Diamond|width=40|float=none}} |
||
| + | |Diamond |
||
|- style="background:linear-gradient(to right, rgb(0,200,247),rgb(255,255,255));" |
|- style="background:linear-gradient(to right, rgb(0,200,247),rgb(255,255,255));" |
||
| − | | colspan=" |
+ | | colspan="13" | |
|- |
|- |
||
| − | | rowspan="2" |[[Skyfallen Gift H]] |
+ | | rowspan="2" |空からの贈物 上級<br />[[Skyfallen Gift H]] |
|60 |
|60 |
||
| rowspan="2" |100 |
| rowspan="2" |100 |
||
| Line 540: | Line 576: | ||
|8 |
|8 |
||
| rowspan="2" | |
| rowspan="2" | |
||
| + | |{{Align icon|Bouquet|width=40|float=none}} |
||
| − | |Bouquet (100%) x3 |
||
| − | | |
+ | |Bouquet x2 |
| + | |{{Align icon|Crystal|width=40|float=none}} |
||
| − | | rowspan="2" |2.993 |
||
| + | |Crystal x2 |
||
|- |
|- |
||
|3 |
|3 |
||
|5 |
|5 |
||
|40 |
|40 |
||
| + | |{{Align icon|Ruby|width=40|float=none}} |
||
| − | |Ruby (31%) |
||
| + | |Ruby x2 |
||
| − | |Diamond (21%) |
||
| + | |{{Align icon|Diamond|width=40|float=none}} |
||
| + | |Diamond |
||
|- style="background:linear-gradient(to left, rgb(0,200,247),rgb(255,255,255));" |
|- style="background:linear-gradient(to left, rgb(0,200,247),rgb(255,255,255));" |
||
| − | | colspan=" |
+ | | colspan="13" | |
|- |
|- |
||
| − | | rowspan="2" |[[Skyfallen Gift X]] |
+ | | rowspan="2" |空からの贈物 極級<br />[[Skyfallen Gift X]] |
|80 |
|80 |
||
| rowspan="2" |120 |
| rowspan="2" |120 |
||
| Line 559: | Line 598: | ||
|8 |
|8 |
||
| rowspan="2" | |
| rowspan="2" | |
||
| + | |{{Align icon|Crystal|width=40|float=none}} |
||
| − | |Crystal (71%) x4 |
||
| + | |Crystal x3 |
||
| − | |Ruby (41%) x2 |
||
| + | |{{Align icon|Ruby|width=40|float=none}} |
||
| − | | rowspan="2" |3.788 |
||
| + | |Ruby x3 |
||
|- |
|- |
||
|3 |
|3 |
||
|5 |
|5 |
||
|45 |
|45 |
||
| + | |{{Align icon|Diamond|width=40|float=none}} |
||
| − | |Diamond (31%) |
||
| + | |Diamond |
||
| − | | - |
||
| + | | colspan="2" | - |
||
|- style="background:linear-gradient(to right, rgb(0,200,247),rgb(255,255,255));" |
|- style="background:linear-gradient(to right, rgb(0,200,247),rgb(255,255,255));" |
||
| − | | colspan=" |
+ | | colspan="13" | |
|- |
|- |
||
| − | | rowspan="2" |[[Skyfallen Gift G]] |
+ | | rowspan="2" |空からの贈物 神級<br />[[Skyfallen Gift G]] |
|80 |
|80 |
||
| rowspan="2" |140 |
| rowspan="2" |140 |
||
| Line 578: | Line 619: | ||
|8 |
|8 |
||
| rowspan="2" | |
| rowspan="2" | |
||
| − | | rowspan="2" |Ruby |
+ | | rowspan="2" |{{Align icon|Ruby|width=40|float=none}} |
| − | | rowspan="2" | |
+ | | rowspan="2" |Ruby x3 |
| − | | rowspan="2" | |
+ | | rowspan="2" |{{Align icon|Diamond|width=40|float=none}} |
| + | | rowspan="2" |Diamond x4 |
||
|- |
|- |
||
|4 |
|4 |
||
| Line 586: | Line 628: | ||
|92 |
|92 |
||
|} |
|} |
||
| − | |||
| − | <small><references /></small> |
||
== Friday - Golden Armor == |
== Friday - Golden Armor == |
||
| Line 598: | Line 638: | ||
The same as [[Daily Missions#Wednesday - Guardian of the Magic Crystal|Wednesday]]. |
The same as [[Daily Missions#Wednesday - Guardian of the Magic Crystal|Wednesday]]. |
||
| − | == |
+ | == Awakening Orb Daily == |
| − | These missions allow players to collect |
+ | These missions allow players to collect Awakening Orbs (覚醒の宝珠), one of the materials for the [[Awakening]] system. |
{| class="wikitable" style="text-align:center" |
{| class="wikitable" style="text-align:center" |
||
| Line 610: | Line 650: | ||
! Units |
! Units |
||
! rowspan="2" | |
! rowspan="2" | |
||
| − | ! colspan=" |
+ | ! colspan="6" rowspan="2" |Drops |
| − | Orb Drops |
||
|- |
|- |
||
! Sta |
! Sta |
||
| Line 617: | Line 656: | ||
! Enemies |
! Enemies |
||
|- |
|- |
||
| − | | rowspan="2" | |
+ | | rowspan="2" |白き射手 神級<br />[[White Archer G]]<br />(Monday) |
|90 |
|90 |
||
| rowspan="2" |250 |
| rowspan="2" |250 |
||
| Line 624: | Line 663: | ||
|8 |
|8 |
||
| rowspan="2" | |
| rowspan="2" | |
||
| + | |{{Align icon|Archer Orb|width=40|float=none}} |
||
|Sniper |
|Sniper |
||
| + | |{{Align icon|Dark Fighter Orb|width=40|float=none}} |
||
|Dark Knight |
|Dark Knight |
||
| + | |{{Align icon|Healer Orb|width=40|float=none}} |
||
| − | |Priestess |
||
| + | |Priest |
||
|- |
|- |
||
|0 |
|0 |
||
| − | | |
+ | |15 |
|34 |
|34 |
||
| + | |{{Align icon|Rearguard Tactician Orb|width=40|float=none}} |
||
|Rearguard Strategist |
|Rearguard Strategist |
||
| + | |{{Align icon|Gunner Orb|width=40|float=none}} |
||
|Heavy Gunner |
|Heavy Gunner |
||
| + | | colspan="2" | - |
||
| − | |<nowiki>-</nowiki> |
||
|- style="background:linear-gradient(to right, rgb(1, 152, 208), rgb(255,255,255));" |
|- style="background:linear-gradient(to right, rgb(1, 152, 208), rgb(255,255,255));" |
||
| − | | colspan=" |
+ | | colspan="14" | |
|- |
|- |
||
| − | | rowspan="2" | |
+ | | rowspan="2" |一角獣騎士 神級<br />[[Unicorn Knight G]]<br />(Tuesday) |
|90 |
|90 |
||
| rowspan="2" |250 |
| rowspan="2" |250 |
||
| Line 644: | Line 688: | ||
|8 |
|8 |
||
| rowspan="2" | |
| rowspan="2" | |
||
| + | |{{Align icon|Valkyrie Orb|width=40|float=none}} |
||
|Unicorn Knight |
|Unicorn Knight |
||
| + | |{{Align icon|Pegasus Rider Orb|width=40|float=none}} |
||
|Pegasus Knight |
|Pegasus Knight |
||
| + | |{{Align icon|Monk Orb|width=40|float=none}} |
||
| − | |Monk |
||
| + | |Master Monk |
||
|- |
|- |
||
|0 |
|0 |
||
| − | | |
+ | |15 |
|33 |
|33 |
||
| + | |{{Align icon|Bandit Orb|width=40|float=none}} |
||
|Berserker |
|Berserker |
||
| + | |{{Align icon|Feng Shui User Orb|width=40|float=none}} |
||
|Feng Shui Master |
|Feng Shui Master |
||
| + | | colspan="2" | - |
||
| − | |<nowiki>-</nowiki> |
||
|- style="background:linear-gradient(to left, rgb(1, 152, 208),rgb(255,255,255));" |
|- style="background:linear-gradient(to left, rgb(1, 152, 208),rgb(255,255,255));" |
||
| − | | colspan=" |
+ | | colspan="14" | |
|- |
|- |
||
| − | | rowspan="2" | |
+ | | rowspan="2" |伝説の海賊 神級<br />[[Legendary Pirate G]]<br />(Wednesday) |
|90 |
|90 |
||
| rowspan="2" |250 |
| rowspan="2" |250 |
||
| Line 664: | Line 713: | ||
|8 |
|8 |
||
| rowspan="2" | |
| rowspan="2" | |
||
| + | |{{Align icon|Soldier Orb|width=40|float=none}} |
||
|Soldier Chief |
|Soldier Chief |
||
| + | |{{Align icon|Rogue Orb|width=40|float=none}} |
||
|Assassin |
|Assassin |
||
| + | |{{Align icon|Pirate Orb|width=40|float=none}} |
||
|Captain |
|Captain |
||
|- |
|- |
||
|0 |
|0 |
||
| − | | |
+ | |15 |
|34 |
|34 |
||
| + | |{{Align icon|Shaman Orb|width=40|float=none}} |
||
|High Shaman |
|High Shaman |
||
| + | |{{Align icon|Bishop Orb|width=40|float=none}} |
||
|High Bishop |
|High Bishop |
||
| + | | colspan="2" | - |
||
| − | |<nowiki>-</nowiki> |
||
|- style="background:linear-gradient(to right, rgb(1, 152, 208),rgb(255,255,255));" |
|- style="background:linear-gradient(to right, rgb(1, 152, 208),rgb(255,255,255));" |
||
| − | | colspan=" |
+ | | colspan="14" | |
|- |
|- |
||
| − | | rowspan="2" | |
+ | | rowspan="2" |怪力少女 神級<br />[[Superhuman Girl G]]<br />(Thursday) |
|90 |
|90 |
||
| rowspan="2" |250 |
| rowspan="2" |250 |
||
| Line 684: | Line 738: | ||
|8 |
|8 |
||
| rowspan="2" | |
| rowspan="2" | |
||
| + | |{{Align icon|Heavy Armor Orb|width=40|float=none}} |
||
|Battle Master |
|Battle Master |
||
| + | |{{Align icon|Samurai Orb|width=40|float=none}} |
||
|Samurai Master |
|Samurai Master |
||
| + | |{{Align icon|Magic Fencer Orb|width=40|float=none}} |
||
|Rune Fencer |
|Rune Fencer |
||
|- |
|- |
||
|0 |
|0 |
||
| − | | |
+ | |15 |
|34 |
|34 |
||
| + | |{{Align icon|Vampire Hunter Orb|width=40|float=none}} |
||
|Vampire Killer |
|Vampire Killer |
||
| + | |{{Align icon|Sailor Orb|width=40|float=none}} |
||
|Sailor Chief |
|Sailor Chief |
||
| + | | colspan="2" | - |
||
| − | |<nowiki>-</nowiki> |
||
|- style="background:linear-gradient(to left, rgb(1, 152, 208),rgb(255,255,255));" |
|- style="background:linear-gradient(to left, rgb(1, 152, 208),rgb(255,255,255));" |
||
| − | | colspan=" |
+ | | colspan="14" | |
|- |
|- |
||
| − | | rowspan="2" | |
+ | | rowspan="2" |魔女 神級<br />[[Witch G]]<br />(Friday) |
|90 |
|90 |
||
| rowspan="2" |250 |
| rowspan="2" |250 |
||
| Line 704: | Line 763: | ||
|8 |
|8 |
||
| rowspan="2" | |
| rowspan="2" | |
||
| + | |{{Align icon|Witch Orb|width=40|float=none}} |
||
|Lord Witch |
|Lord Witch |
||
| + | |{{Align icon|Mage Orb|width=40|float=none}} |
||
|Warlock |
|Warlock |
||
| + | |{{Align icon|Vanguard Tactician Orb|width=40|float=none}} |
||
|Vanguard Strategist |
|Vanguard Strategist |
||
|- |
|- |
||
|0 |
|0 |
||
| − | | |
+ | |15 |
|31 |
|31 |
||
| + | |{{Align icon|Ninja Orb|width=40|float=none}} |
||
|Ninja Master |
|Ninja Master |
||
| + | |{{Align icon|Angel Orb|width=40|float=none}} |
||
|Arch Angel |
|Arch Angel |
||
| + | | colspan="2" | - |
||
| − | |<nowiki>-</nowiki> |
||
|- style="background:linear-gradient(to right, rgb(1, 152, 208),rgb(255,255,255));" |
|- style="background:linear-gradient(to right, rgb(1, 152, 208),rgb(255,255,255));" |
||
| − | | colspan=" |
+ | | colspan="14" | |
|- |
|- |
||
| − | | rowspan="2" | |
+ | | rowspan="2" |魔導鎧姫 神級<br />[[Magic Armor Princess G]]<br />(Saturday) |
|90 |
|90 |
||
| rowspan="2" |250 |
| rowspan="2" |250 |
||
| Line 724: | Line 788: | ||
|8 |
|8 |
||
| rowspan="2" | |
| rowspan="2" | |
||
| + | |{{Align icon|Mage Armor Orb|width=40|float=none}} |
||
|Battle Mage |
|Battle Mage |
||
| + | |{{Align icon|Ranger Orb|width=40|float=none}} |
||
|High Ranger |
|High Ranger |
||
| + | |{{Align icon|Dancer Orb|width=40|float=none}} |
||
|Top Dancer |
|Top Dancer |
||
|- |
|- |
||
|0 |
|0 |
||
| − | | |
+ | |15 |
|31 |
|31 |
||
| + | |{{Align icon|Dragon Rider Orb|width=40|float=none}} |
||
|Dragon Knight |
|Dragon Knight |
||
| + | |{{Align icon|Priest Warrior Orb|width=40|float=none}} |
||
|Priest Warrior Leader |
|Priest Warrior Leader |
||
| + | | colspan="2" | - |
||
| − | |<nowiki>-</nowiki> |
||
|- style="background:linear-gradient(to left, rgb(1, 152, 208),rgb(255,255,255));" |
|- style="background:linear-gradient(to left, rgb(1, 152, 208),rgb(255,255,255));" |
||
| − | | colspan=" |
+ | | colspan="14" | |
|- |
|- |
||
| − | | rowspan="2" | |
+ | | rowspan="2" |月影の弓騎兵 神級<br />[[Moon Shadow Bow Rider G]]<br />(Sunday) |
|90 |
|90 |
||
| rowspan="2" |250 |
| rowspan="2" |250 |
||
| Line 744: | Line 813: | ||
|8 |
|8 |
||
| rowspan="2" | |
| rowspan="2" | |
||
| + | |{{Align icon|Alchemist Orb|width=40|float=none}} |
||
|High Alchemist |
|High Alchemist |
||
| + | |{{Align icon|Curse User Orb|width=40|float=none}} |
||
|Witch Doctor |
|Witch Doctor |
||
| + | |{{Align icon|Puppeteer Orb|width=40|float=none}} |
||
|Machinist |
|Machinist |
||
|- |
|- |
||
|0 |
|0 |
||
| − | | |
+ | |15 |
|34 |
|34 |
||
| + | |{{Align icon|Thief Orb|width=40|float=none}} |
||
|Master Thief |
|Master Thief |
||
| + | |{{Align icon|Bowrider Orb|width=40|float=none}} |
||
|Bowrider Chief |
|Bowrider Chief |
||
| + | | colspan="2" | - |
||
| − | |<nowiki>-</nowiki> |
||
|} |
|} |
||
| − | * All orbs have |
+ | * All orbs have a 50% drop rate (100% during x2 drop rate events). |
| + | == Saturday, Sunday - The Battlefield of Warriors == |
||
| − | == Daily Mission Drop Rate Increase == |
||
| + | This mission allows players to collect [[Naiad|Naiad, Spirit of Skill Awakening]], one of the materials for the [[Skill Awakening]] system. Only Prince and Awakened units can be deployed - however, bear in mind that unawakened units with an ability that affects team members, such as [[Altair]] and [[Rion]], can be included for their buffs, despite being unable to participate in combat. |
||
| − | On occasion, in place of a new event, a drop rate increase will be temporarily introduced as a "break" from regular events. Typically it involves double drop rate on orbs (see [[Daily Missions#Gem Daily|Gem Daily]]), and 1.5x drop rate on all other daily missions ([[Daily Missions#Monday - Golden Armor|Golden Armor]], [[Daily Missions#Tuesday - Spirit Rescue|Spirit Rescue]], [[Daily Missions#Wednesday - A Toast to Men.2FSkyfallen Gift|A Toast to Men/Skyfallen Gift]], and [[Daily Missions#Thursday - Guardian of the Magic Crystal|Guardian of the Magic Crystal]]).<br /> |
||
| − | *This does not affect the drop rate of rewards on [[Challenge Quests]], [[Story Missions]], or [[Event Missions]]. |
||
| − | {| class="wikitable |
+ | {| class="wikitable" style="text-align:center" |
|- |
|- |
||
| + | ! rowspan="2" | Stage Name |
||
| − | ! colspan="4" |Drop Rate Increase Table (2017) |
||
| + | ! Cha |
||
| + | ! rowspan="2" | Exp |
||
| + | ! rowspan="2" | Gold |
||
| + | ! Points |
||
| + | ! Units |
||
| + | ! rowspan="2" | |
||
| + | ! colspan="2" rowspan="2" | Drops |
||
|- |
|- |
||
| + | ! Sta |
||
| − | ! Daily Drop Rate |
||
| + | ! Life |
||
| − | ! Orb Drop Rate |
||
| + | ! Enemies |
||
| − | ! Start Date |
||
| − | ! End Date |
||
|- |
|- |
||
| + | | rowspan="2" |強者の集う戦場<br />[[The Battlefield of Warriors]] |
||
| − | | x1.5 |
||
| + | |90 |
||
| − | | x2.0 |
||
| + | | rowspan="2" |250 |
||
| − | | - |
||
| + | | rowspan="2" |3000 |
||
| − | | - |
||
| + | |10 |
||
| + | |8 |
||
| + | | rowspan="2" | |
||
| + | | rowspan="2" |{{Align icon|Naiad|width=40|float=none}} |
||
| + | | rowspan="2" |[[Naiad]] x4 |
||
| + | |- |
||
| + | |0 |
||
| + | |10 |
||
| + | |36 |
||
|} |
|} |
||
| − | |||
| − | == Video Guides == |
||
| − | [http://harem-battle.club/millennium-war-aigis/1059-desert-gem-mission-guide.html Desert and Gems Mission Guide] |
||
| − | |||
| − | [http://harem-battle.club/millennium-war-aigis/879-random-video-guide-sharing.html Gems Daily Missions Guide] |
||
| − | |||
| − | [https://www.youtube.com/playlist?list=PL-vcI6413BKUuGFzvfkI9_OM2f_EQ4beY Gems Daily Missions Guide(English version)] |
||
| − | |||
| − | [http://millenniumwaraigis.wikia.com/wiki/Talk:Daily_Missions/@comment-EonLightVoyager-20160427030147?redirect=no X and G Daily Missions Guide] |
||
| − | |||
| − | [https://www.youtube.com/playlist?list=PLIqHr2WTFOpDoFV7oNDLt-wcETv9MOsm7 CrabCorporation's Gems-Daily missions guide] |
||
| − | |||
| − | [https://www.youtube.com/playlist?list=PL80_In1dMoelw7RrOPjOE02X3y11IE3eP Alternate Daily Missions Guide] |
||
| − | |||
| − | == Glossary == |
||
| − | A few Japanese words that can be helpful in finding playthroughs on youtube and nico video: |
||
| − | *神級 - G tier (god); |
||
| − | *極級 - X tier (extreme); |
||
| − | *上級 - H tier (hard); |
||
| − | *中級 - N tier (normal); |
||
| − | *初級 - E tier (easy); |
||
| − | *黄金の鎧 - Golden Armor; |
||
| − | *聖霊救出 - Spirit Rescue; |
||
| − | *空からの贈物 - Skyfallen Gift; |
||
| − | *男だけの祝杯 - A Toast to Men; |
||
| − | *新魔水晶の守護者 - Crystal Keeper; |
||
Revision as of 01:19, 2 November 2019
Daily Missions (曜日限定ミッション) are sets of missions that allow players to accumulate specific resources en masse. Daily Missions are available for 1 day each, and rotate out on a fixed schedule. There are 5 difficulty tiers for each of the missions - Easy (初級), Normal (中級), Hard (上級), Extreme (極級), and God (神級).
The Daily Missions rotate at 00:00 JST.
Monday - Golden Armor
Here, players can collect both Gold Armors and Platinum Armors, as well as a large amount of Gold. The area is under a poisonous field effect, which deals damage-over-time to all friendly units. The Armors each have a chance to drop themselves, with the Platinum Armor being significantly rarer than Gold Armors.
Tips
In general, bring plenty of magic damage with you (Witches, Mages, Princesses etc.), as the Armors have very high defense values and are the primary objective in this mission. Because of the poison, strong healers are also necessary.
The most efficient map for Gold is Golden Armor X. Golden Armor N, while slightly less efficient, is more forgiving in terms of Charisma cost.
The most efficient map for Platinum Armors is Golden Armor G.
| Stage Name | Cha | Exp | Gold | Points | Units | Drops | ||||||||
|---|---|---|---|---|---|---|---|---|---|---|---|---|---|---|
| Sta | Life | Enemies | ||||||||||||
| 黄金の鎧 初級 Golden Armor E |
15 | 50 | 7500 | 30 | 8 | Gold Armor x4 | Platinum Armor | |||||||
| 2 | 5 | 23 | ||||||||||||
| 黄金の鎧 中級 Golden Armor N |
24 | 70 | 9000 | 30 | 8 | Gold Armor x5 | Platinum Armor | |||||||
| 2 | 5 | 27 | ||||||||||||
| 黄金の鎧 上級 Golden Armor H |
60 | 100 | 10500 | 35 | 8 | Gold Armor x6 | Platinum Armor | |||||||
| 3 | 5 | 30 | ||||||||||||
| 黄金の鎧 極級 Golden Armor X |
80 | 120 | 15000 | 35 | 8 | Gold Armor x6 | Platinum Armor | |||||||
| 3 | 5 | 30 | ||||||||||||
| 黄金の鎧 神級 Golden Armor G |
80 | 160 | 31500 | 40 | 9 | Gold Armor x4 | Platinum Armor x3 | |||||||
| 6 | 5 | 30 | ||||||||||||
Tuesday - Spirit Rescue
Here, players can collect Spirits of all rarities from Silver to Rainbow. The mission consists of large waves of fast enemies, which is best dealt with using strong, cheap blockers. Although AoE is desirable, it is much too expensive to deploy here, so archers are much more useful. As with the majority of dailies, this map also has the poison effect which deals your units damage over time, so a Healer is advised.
It should be noted that all Spirits drop from specifically colored wolves only.
Tips
On Spirit Rescue H, bring some max-level fully-cost-reduced bronze soldiers (Atla, Hector, Leo, and/or Ryujin Soldier if you have him) for early blocking while you set your main formation up. It will help immensely in 3 starring the map.
| Stage Name | Cha | Exp | Gold | Points | Units | Drops | |||||||
|---|---|---|---|---|---|---|---|---|---|---|---|---|---|
| Sta | Life | Enemies | |||||||||||
| 聖霊救出 初級 Spirit Rescue E |
15 | 80 | 1875 | 30 | 8 | Spirit of Silver x2 | Spirit of Gold | Spirit of Platinum | |||||
| 2 | 5 | 27 | Spirit of Black | Spirit of Rainbow | - | ||||||||
| 聖霊救出 中級 Spirit Rescue N |
30 | 90 | 2250 | 30 | 8 | Spirit of Silver | Spirit of Gold x2 | Spirit of Platinum | |||||
| 3 | 5 | 40 | Spirit of Black | Spirit of Rainbow | - | ||||||||
| 聖霊救出 上級 Spirit Rescue H |
60 | 120 | 3750 | 30 | 8 | Spirit of Gold | Spirit of Platinum x2 | Spirit of Black x2 | |||||
| 6 | 5 | 57 | Spirit of Rainbow x2 | - | - | ||||||||
| 聖霊救出 極級 Spirit Rescue X |
80 | 180 | 4500 | 40 | 8 | Spirit of Platinum | Spirit of Black x3 | Spirit of Rainbow x2 | |||||
| 6 | 5 | 39 | |||||||||||
| 聖霊救出 神級 Spirit Rescue G |
80 | 200 | 4500 | 45 | 10 | Spirit of Platinum x2 | Spirit of Black x2 | Spirit of Rainbow x2 | |||||
| 8 | 10 | 33 | Spirit Queen | - | - | ||||||||
Wednesday - Guardian of the Magic Crystal
Here, players can collect Demon Crystals for use at the Trading Post (not to be mistaken with Sacred Crystals, the in-game premium currency). As with most other daily missions, the maps have a poison effect, dealing damage-over-time to all units.
Crystal Keeper E and N contain a mixture of grounded and flying units, with an emphasis on armors. Crystal Keeper H contains nothing but waves of the Flying Eyes. Nevertheless, it is still only the flying units that can drop Demon Crystals.
Tips
To 3-star Crystal Keeper H, you'll need at least one class-evolved, high-level silver archer (preferably two) and one class-evolved, high-level silver healer, along with a high level Prince with the Savior title.
The Flying Eyes have approximately 480 HP and 150 DEF. Crystal Keeper X Flying Eyes have 660 HP and 150 DEF. Crystal Keeper G Flying Eyes have 750 HP and 150 DEF.
| Stage Name | Cha | Exp | Gold | Points | Units | Drops | ||||||||||
|---|---|---|---|---|---|---|---|---|---|---|---|---|---|---|---|---|
| Sta | Life | Enemies | ||||||||||||||
| 新魔水晶の守護者 初級 Guardian of the Magic Crystal E |
15 | 90 | 1350 | 30 | 8 | Demon Crystal x4 | Demon Crystals (2) x2 | - | ||||||||
| 4 | 5 | 13 | ||||||||||||||
| 新魔水晶の守護者 中級 Guardian of the Magic Crystal N |
30 | 130 | 2400 | 30 | 8 | Demon Crystals (2) x4 | Demon Crystals (3) x2 | - | ||||||||
| 6 | 5 | 20 | ||||||||||||||
| 新魔水晶の守護者 上級 Guardian of the Magic Crystal H |
45 | 200 | 3000 | 30 | 8 | Demon Crystals (2) x2 | Demon Crystals (3) x2 | Demon Crystals (5) x2 | ||||||||
| 8 | 5 | 39 | ||||||||||||||
| 新魔水晶の守護者 極級 Guardian of the Magic Crystal X |
60 | 220 | 3000 | 40 | 8 | Demon Crystals (2) x2 | Demon Crystals (3) x3 | Demon Crystals (5) x2 | ||||||||
| 8 | 5 | 66 | ||||||||||||||
| 新魔水晶の守護者 神級 Guardian of the Magic Crystal G |
70 | 240 | 3000 | 45 | 8 | Demon Crystals (3) x4 | Demon Crystals (5) x3 | - | ||||||||
| 8 | 10 | 70 | ||||||||||||||
Thursday - A Toast to Men/Skyfallen Gift
Here, players can can collect Gift Items and as such is split up in 2 different types of missions: A Toast to Men for male affection items, and Skyfallen Gift for female affection items.
A Toast to Men only allows male units. It is the only stable source for male affection items in the game.
Skyfallen Gift only allows ranged units to be used. In addition, it takes place in a poisonous map, dealing damage-over-time to your units.
Tips
A Toast to Men
Having Christopher or Robert in your team can make things easier - because the majority of available male units are melee, a healer is very valuable in these missions. Even without Christopher, players can 3-star A Toast to Men H if they bring at least two max-level fully-cost-reduced bronze archers (Ars and/or Wilfred) to help thin the map of the enemy soldiers and bandits.
Skyfallen Gift
There will be multiple waves of gargoyles and red gargoyles, so it's best to have both magic and physical attackers. Since nearly all units come from the same place, a mage placed right at the entrance or at the fork works really well. In N and H dragons will join the fray, so bringing a strong healer is recommended.
| Stage Name | Cha | Exp | Gold | Points | Units | Drops | ||||||
|---|---|---|---|---|---|---|---|---|---|---|---|---|
| Sta | Life | Enemies | ||||||||||
| 男だけの祝杯 初級 A Toast to Men E |
15 | 80 | 1875 | 30 | 8 | Beer x3 | Table Wine | |||||
| 2 | 5 | 20 | Choice Sake | Millenium Wine | ||||||||
| 男だけの祝杯 中級 A Toast to Men N |
40 | 90 | 2250 | 30 | 8 | Beer x3 | Table Wine | |||||
| 2 | 5 | 36 | Choice Sake | Millenium Wine | ||||||||
| 男だけの祝杯 上級 A Toast to Men H |
60 | 100 | 3000 | 30 | 8 | Beer x2 | Table Wine x2 | |||||
| 3 | 5 | 27 | Choice Sake x2 | Millenium Wine | ||||||||
| 男だけの祝杯 極級 A Toast to Men X |
80 | 120 | 3000 | 35 | 8 | Table Wine x3 | Choice Sake x3 | |||||
| 3 | 5 | 28 | Millenium Wine | - | ||||||||
| 男だけの祝杯 神級 A Toast to Men G |
80 | 140 | 3750 | 40 | 8 | Choice Sake x3 | Millenium Wine x4 | |||||
| 4 | 5 | 31 | ||||||||||
| 空からの贈物 初級 Skyfallen Gift E |
15 | 80 | 1875 | 30 | 8 | Bouquet x3 | Crystal | |||||
| 2 | 5 | 18 | Ruby | Diamond | ||||||||
| 空からの贈物 中級 Skyfallen Gift N |
40 | 90 | 2250 | 30 | 8 | Bouquet x3 | Crystal | |||||
| 2 | 5 | 37 | Ruby | Diamond | ||||||||
| 空からの贈物 上級 Skyfallen Gift H |
60 | 100 | 3000 | 30 | 8 | Bouquet x2 | Crystal x2 | |||||
| 3 | 5 | 40 | Ruby x2 | Diamond | ||||||||
| 空からの贈物 極級 Skyfallen Gift X |
80 | 120 | 3000 | 30 | 8 | Crystal x3 | Ruby x3 | |||||
| 3 | 5 | 45 | Diamond | - | ||||||||
| 空からの贈物 神級 Skyfallen Gift G |
80 | 140 | 3750 | 35 | 8 | Ruby x3 | Diamond x4 | |||||
| 4 | 10 | 92 | ||||||||||
Friday - Golden Armor
The same as Monday.
Saturday - Spirit Rescue
The same as Tuesday.
Sunday - Guardian of the Magic Crystal
The same as Wednesday.
Awakening Orb Daily
These missions allow players to collect Awakening Orbs (覚醒の宝珠), one of the materials for the Awakening system.
| Stage Name | Cha | Exp | Gold | Points | Units | Drops | |||||||
|---|---|---|---|---|---|---|---|---|---|---|---|---|---|
| Sta | Life | Enemies | |||||||||||
| 白き射手 神級 White Archer G (Monday) |
90 | 250 | 3000 | 10 | 8 | Sniper | Dark Knight | Priest | |||||
| 0 | 15 | 34 | Rearguard Strategist | Heavy Gunner | - | ||||||||
| 一角獣騎士 神級 Unicorn Knight G (Tuesday) |
90 | 250 | 3000 | 10 | 8 | Unicorn Knight | Pegasus Knight | Master Monk | |||||
| 0 | 15 | 33 | Berserker | Feng Shui Master | - | ||||||||
| 伝説の海賊 神級 Legendary Pirate G (Wednesday) |
90 | 250 | 3000 | 10 | 8 | Soldier Chief | Assassin | Captain | |||||
| 0 | 15 | 34 | High Shaman | High Bishop | - | ||||||||
| 怪力少女 神級 Superhuman Girl G (Thursday) |
90 | 250 | 3000 | 10 | 8 | Battle Master | Samurai Master | Rune Fencer | |||||
| 0 | 15 | 34 | Vampire Killer | Sailor Chief | - | ||||||||
| 魔女 神級 Witch G (Friday) |
90 | 250 | 3000 | 10 | 8 | Lord Witch | Warlock | Vanguard Strategist | |||||
| 0 | 15 | 31 | Ninja Master | Arch Angel | - | ||||||||
| 魔導鎧姫 神級 Magic Armor Princess G (Saturday) |
90 | 250 | 3000 | 15 | 8 | Battle Mage | High Ranger | Top Dancer | |||||
| 0 | 15 | 31 | Dragon Knight | Priest Warrior Leader | - | ||||||||
| 月影の弓騎兵 神級 Moon Shadow Bow Rider G (Sunday) |
90 | 250 | 3000 | 10 | 8 | High Alchemist | Witch Doctor | Machinist | |||||
| 0 | 15 | 34 | Master Thief | Bowrider Chief | - | ||||||||
- All orbs have a 50% drop rate (100% during x2 drop rate events).
Saturday, Sunday - The Battlefield of Warriors
This mission allows players to collect Naiad, Spirit of Skill Awakening, one of the materials for the Skill Awakening system. Only Prince and Awakened units can be deployed - however, bear in mind that unawakened units with an ability that affects team members, such as Altair and Rion, can be included for their buffs, despite being unable to participate in combat.
| Stage Name | Cha | Exp | Gold | Points | Units | Drops | ||
|---|---|---|---|---|---|---|---|---|
| Sta | Life | Enemies | ||||||
| 強者の集う戦場 The Battlefield of Warriors |
90 | 250 | 3000 | 10 | 8 | Naiad x4 | ||
| 0 | 10 | 36 | ||||||